Outlet layout plan before a renovation: drawings an electrician can read without a call
An outlet layout plan is usually drawn in marker on the wall the day before the walls are chased — and then you spend years running an extension cord to the bed. FUTURIO Home works the other way around: outlets, switches and wire outputs are placed from the furniture you’ve already arranged and land on separate sheets with millimeter offsets.
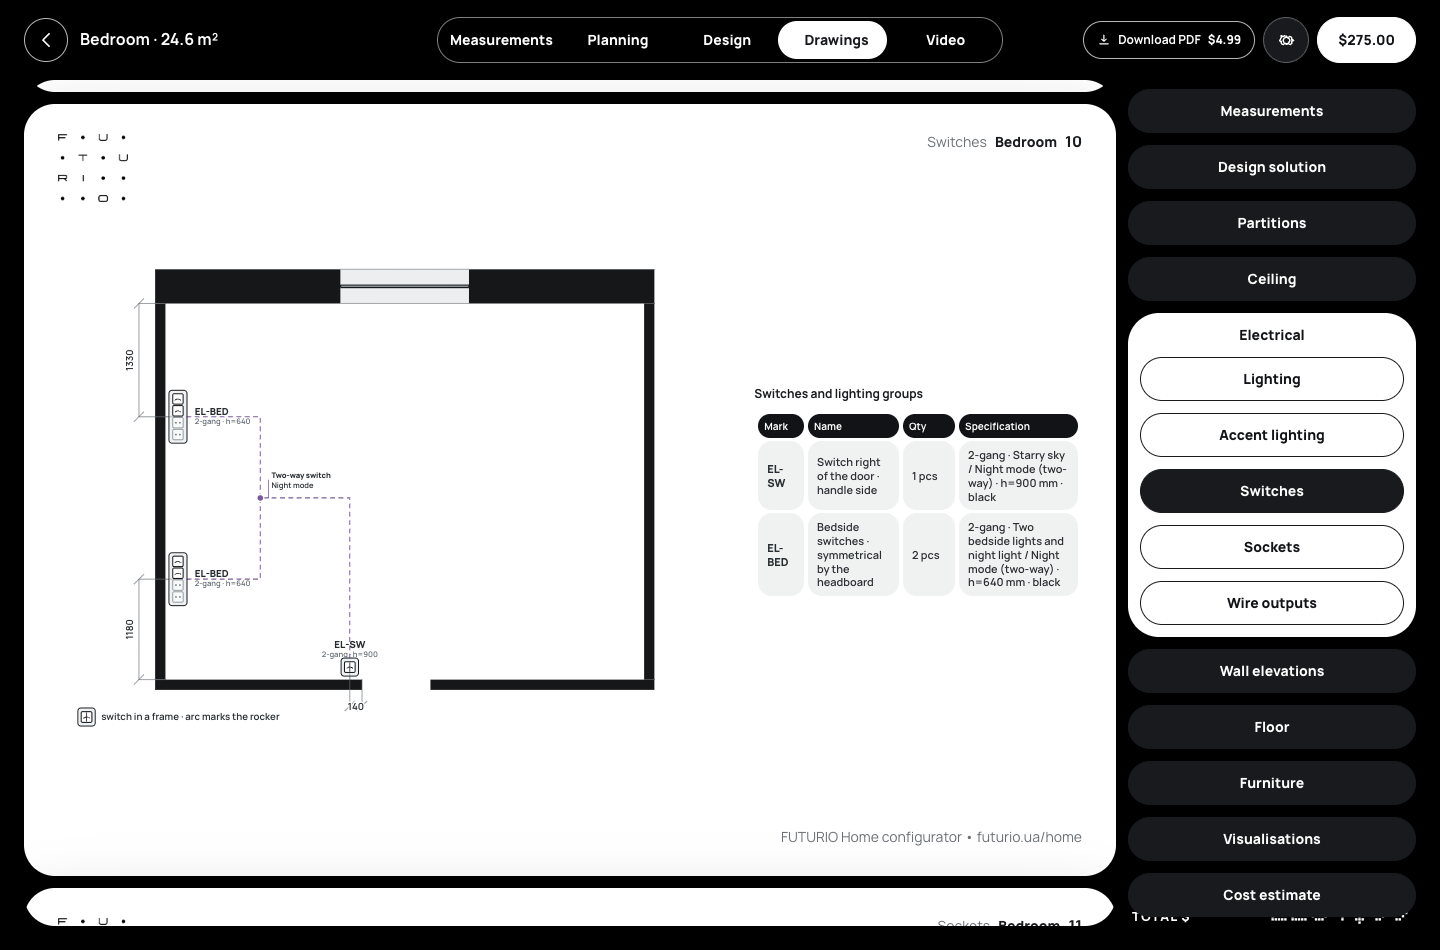
The idea is simple: wiring follows the furniture, not the other way around. The bed decides where bedside switches go, the TV decides its outlet and cable output, the kitchen decides the countertop outlets. And because the 3D scene and the drawings share one set of coordinates, a point on the wall and a point on the sheet are the same point.
Five sheets instead of one mess
The drawing package splits the electrics into separate sheets: lighting, accent lighting, switches, outlets and wire outputs. Each sheet answers one question and has a table with the mark, quantity and height, so the electrician doesn’t have to guess what the circle by the window means.
Points come from the layout: a switch and outlet by the door, controls by the bed, an outlet and output by the TV or projector, an output for the air conditioner, ceiling light, night light, audio and curtain motor. If a door sits on a wall of a custom outline, the switch is anchored to it with the same math.
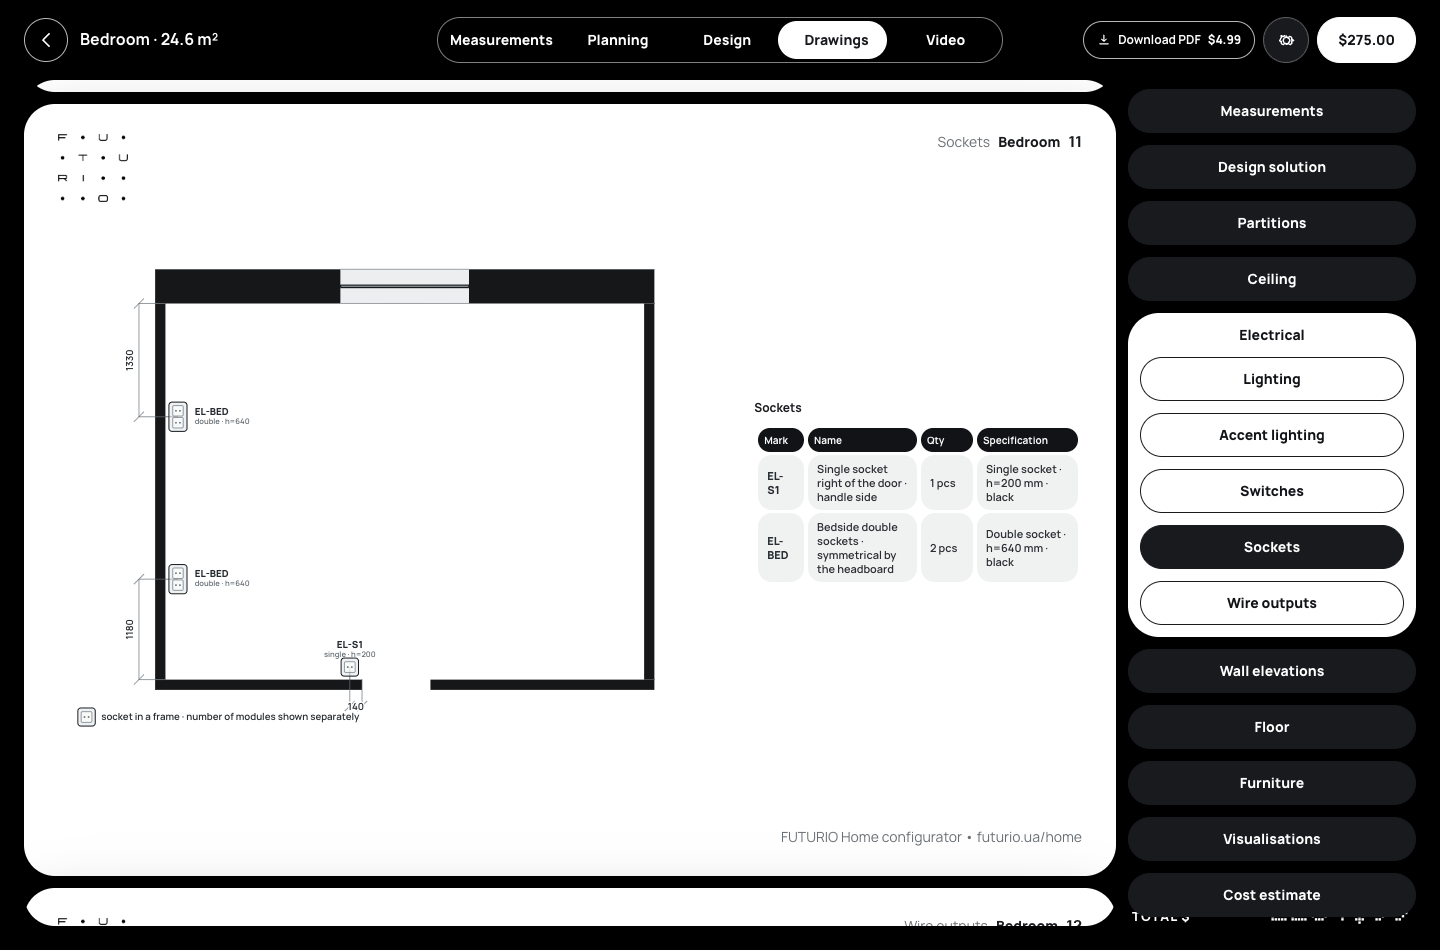
The electrician gets millimeters from a corner, not “somewhere around here.”
Lighting circuits: what controls what
Home splits lighting into circuits. L1 is the ceiling light — starry sky, moonlight or another chosen type. L2 is two bedside lamps and a night light with separate controls by the bed. L3 is night mode: bed, nightstands, desk and wardrobe plinth, with two-way control. L4 is electric curtains, if you’ve turned them on.
The switches sheet shows which button controls which circuit. That’s exactly the conversation to have before the walls are chased: do you need a two-way switch by the door and the bed, or is one enough? Circuits only appear when there’s furniture for them — no bed, no L2.
Decide your lighting scenes before the renovation — after plastering it gets expensive.
Countertop outlets — not right next to the water
In the kitchen, countertop outlets are placed automatically with their center at 1,080 mm and no closer than 300 mm to the sink and the hob. That’s a configurator rule built into the code, not a designer’s suggestion.
For you, that means fewer arguments on site: the distances are already on the drawing. But final decisions on circuits, cable sizes and protection belong to a qualified electrician under local codes — Home shows where the points go, it doesn’t design the panel.
Kitchen heights and clearances are already worked out — you just sign off.
How to hand this to an electrician
Open the drawing package and go through the sheets together: outlets, switches, outputs, accent lighting. Each point has an offset, so it can be transferred to the wall with a tape measure and a level. Move the furniture and the points move with it, and the sheet updates.
Before chasing walls, check for hidden services and actual wall dimensions on site. Home reproduces your project; it doesn’t scan walls. If your measurements are off, so are the offsets.
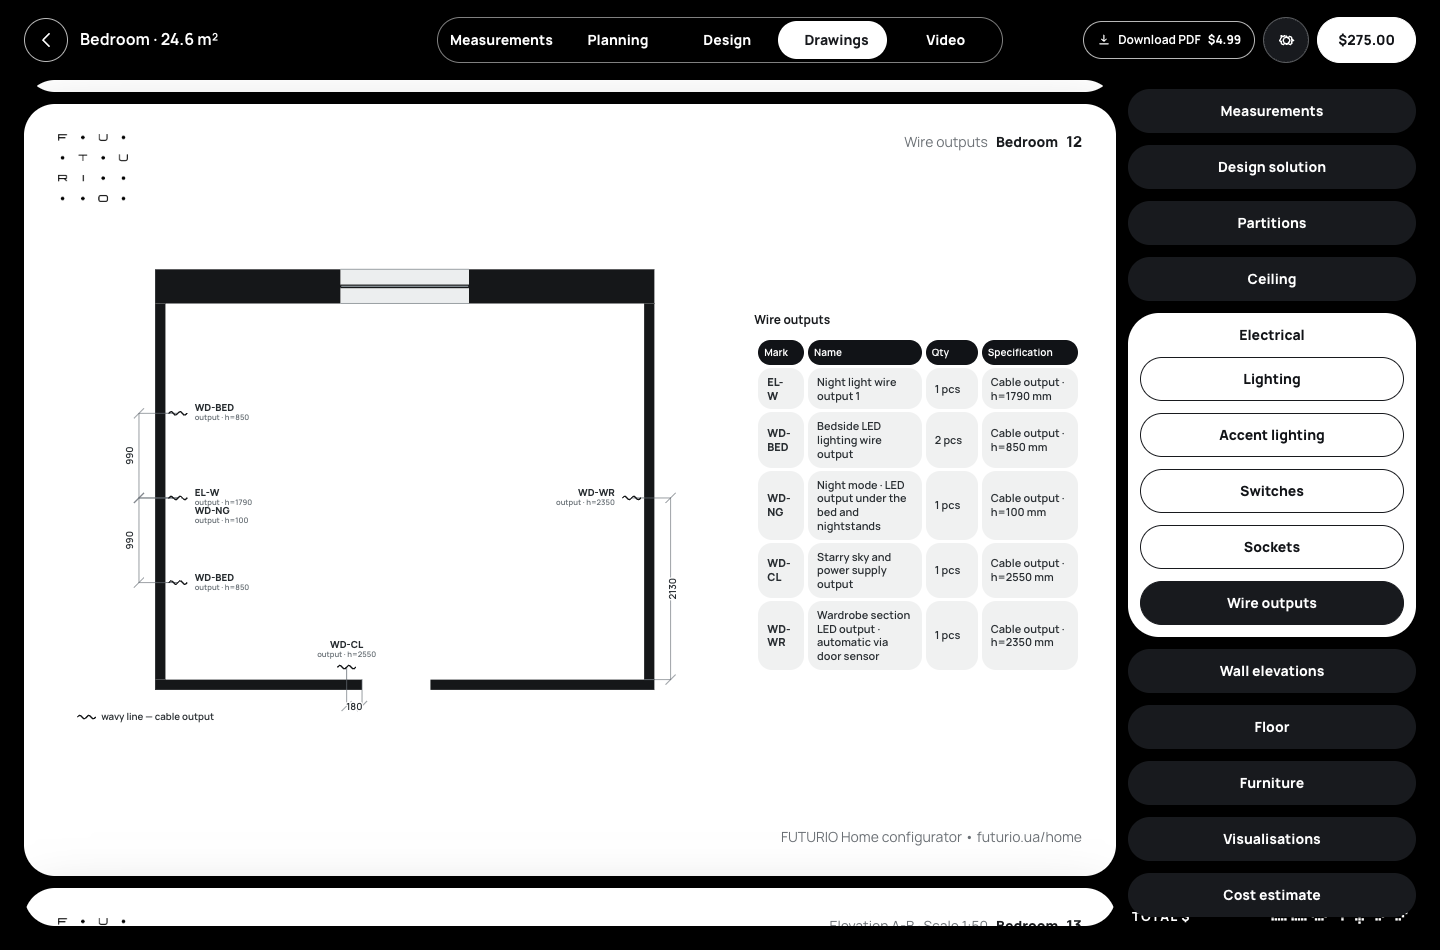
Lock in furniture first, then the wiring — and only then call in the wall chaser.
Verdict: wiring that follows your life, not the wall
The best idea here is the order: furniture first, outlets second. That puts each point where you’ll actually charge a phone or switch on a night light, and the sheets carry offsets and heights an electrician can transfer to the wall without a single “so what did you want here?”
Home doesn’t design the panel, calculate loads or know what’s hiding in your walls. These are placement drawings, not a full electrical design. But placement is exactly what people regret most once the plaster has dried.
Lock in furniture and lighting scenes before the walls are chased — it’s the cheapest time to change your mind.